How to install
I have tried to make installation of Let's encrypt certificate as easy as possible, it is however still a process with several steps (you can skip the steps you are familiar with)
- Azure App Services Setup
- Create a Service Principal
- Grant permissions to the Service Principal
- Install the Lets Encrypt Site Extension
- Configure the Site Extension
I'm not gonna go into details on how to create a App Service in Azure, as there are several ways to do so. But I want to point out one important thing. You need to know if you have the App Hosting Plan in the same resource group as the App Service or you have separate resource groups for the App Service and the App Hosting Plan.
This is important, because certificates are installed on the App Hosting Plan but the hostnames are setup on the App Service so the extension needs access to both resource groups if you have it setup in different resource groups.
Another important aspect of the Azure App Service setup procedure is that you need to configure the following to Connection strings for the Web Job to function properly. The web job is responsible for renewing the certificate once it expires every 3 months.
You need to add the following two Connection strings
AzureWebJobsDashboard and AzureWebJobsStorage
Both of these should be set to an Azure Storage Account connection string, e.g. DefaultEndpointsProtocol=https;AccountName=[myaccount];AccountKey=[mykey];
The storage account must be of kind Storage or StorageV2, BlobStorage will not work.
A service principal is a Azure AD entry that can be used for unattended access to Azure resources. You can consider it service account. You need a service principal with Access to your Resource Group(s) in order for the Let's Encrypt site extension to renew your certificate without manual involvement once they expire. The service principal is also used to install the certificate the first time, in order to validate that it is setup correctly.
You can create a service principal in many different ways, we will just show how to do it manually through the portal.
If you want to do it with PowerShell I recommend this article and their script: http://blogs.msdn.com/b/visualstudioalm/archive/2015/10/04/automating-azure-resource-group-deployment-using-a-service-principal-in-visual-studio-online-build-release-management.aspx
-
Login to your Azure Account through the current portal.
-
Select Active Directory from the left pane.
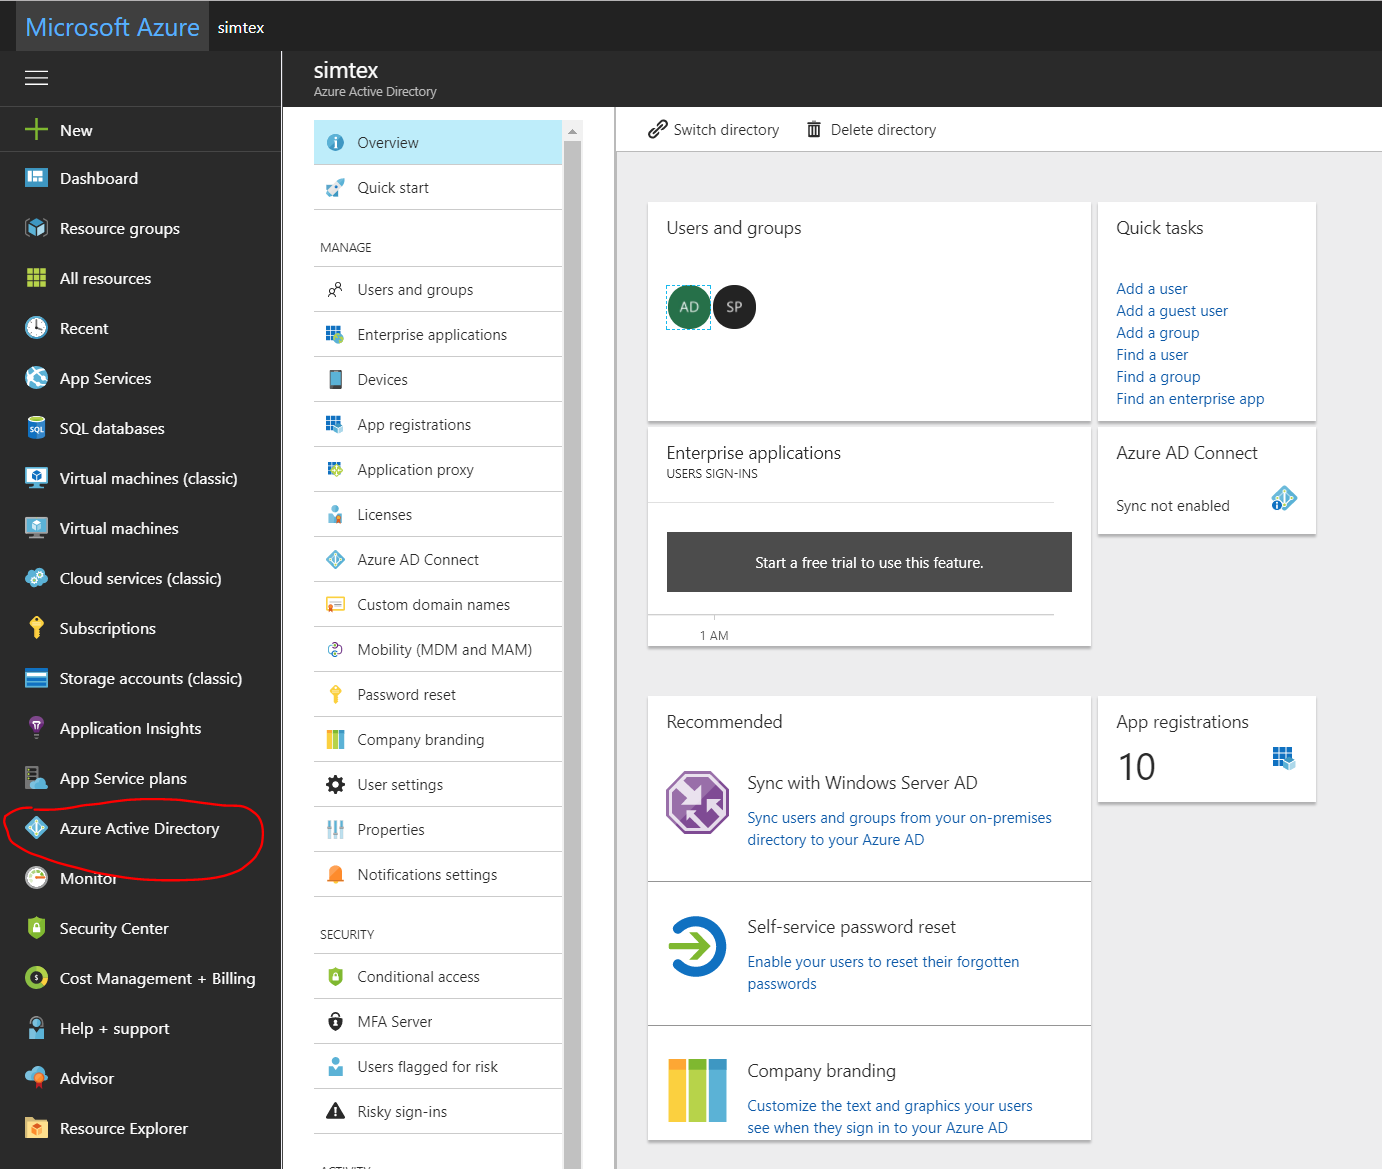
- Select the directory that you want to use for creating the new application.
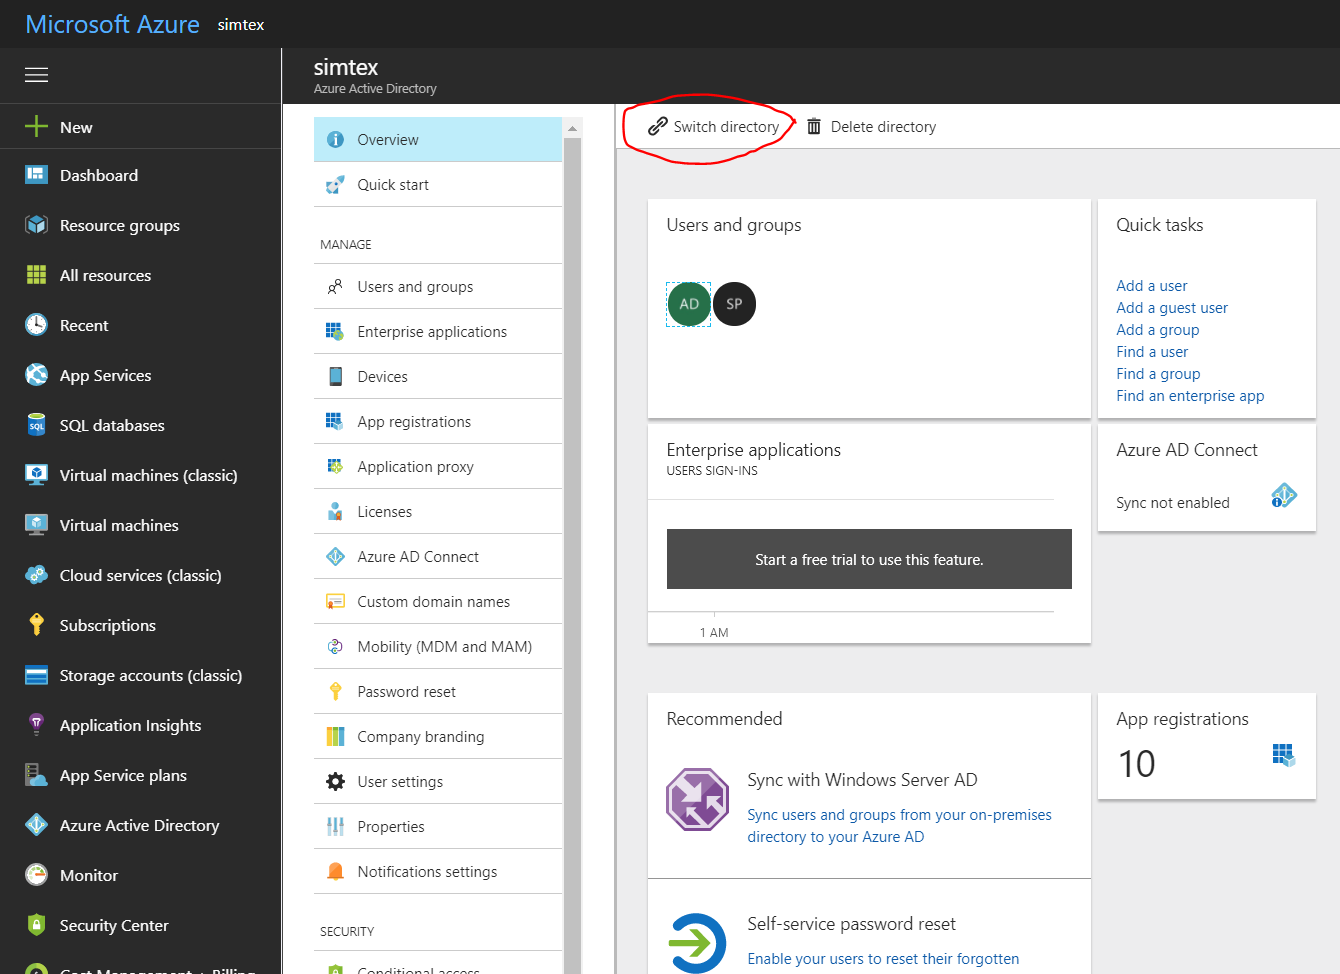
- To view the applications in your directory, click on App Registrations.
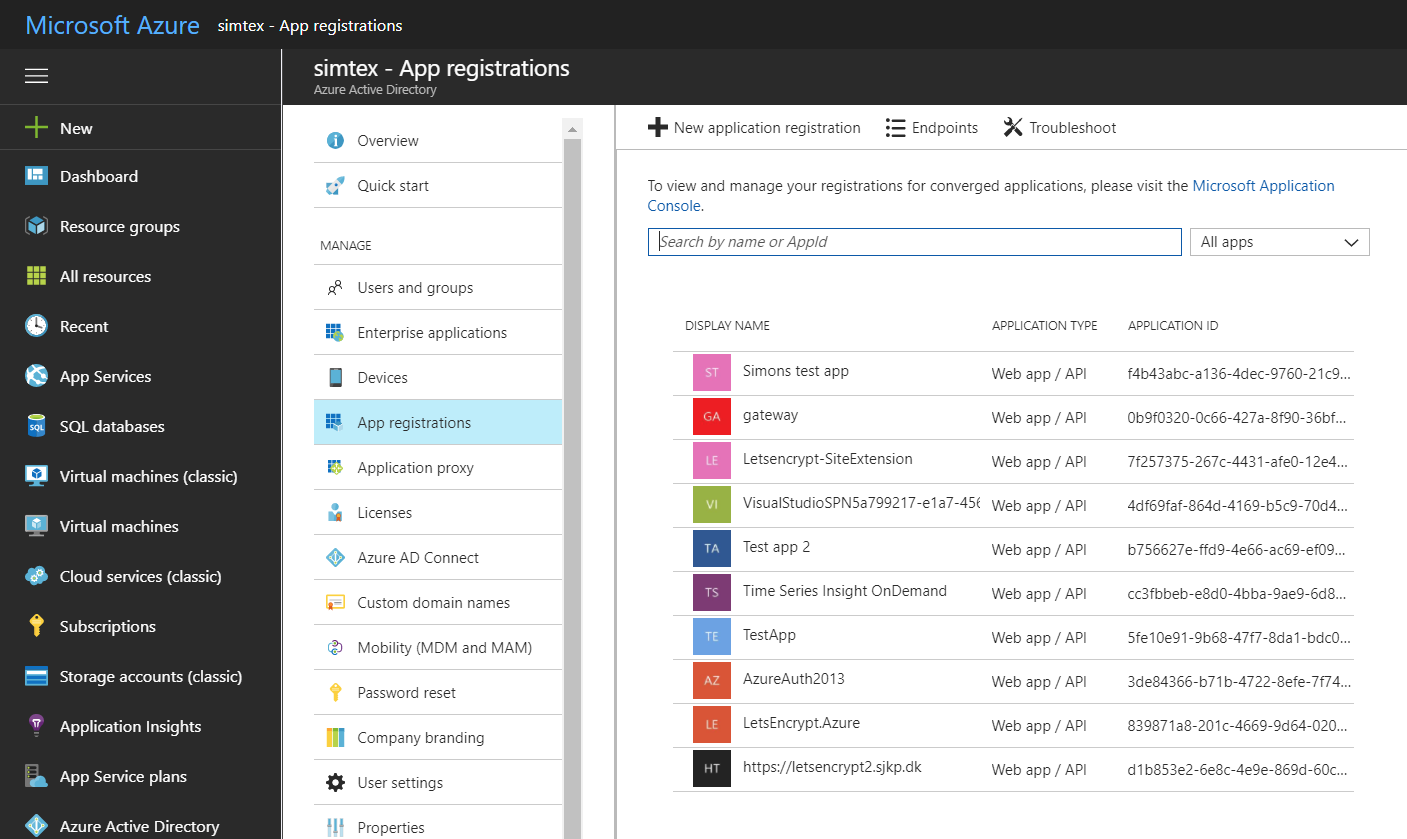
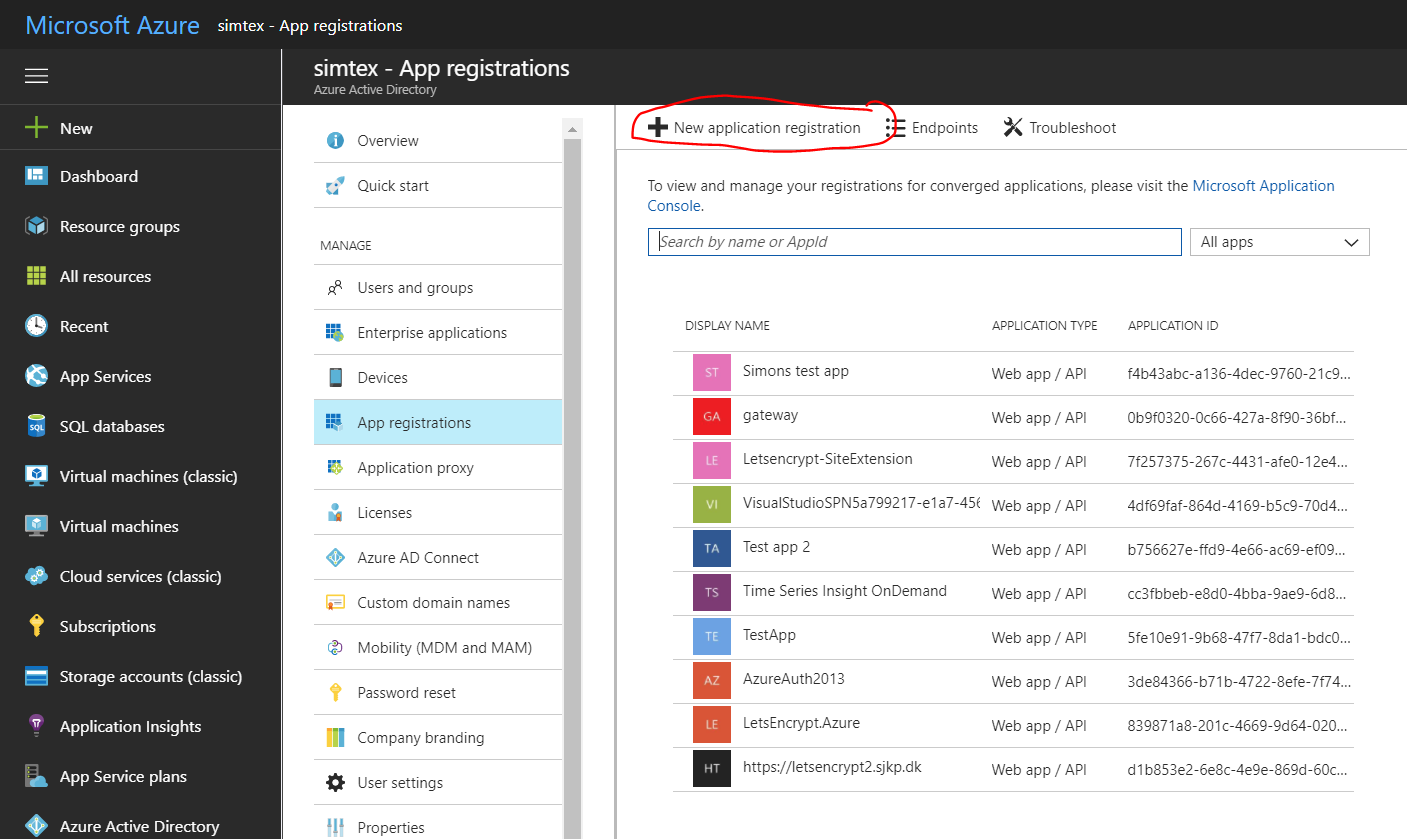
- If you haven't created an application in that directory before you should see something similar to following image. Click on ADD
-
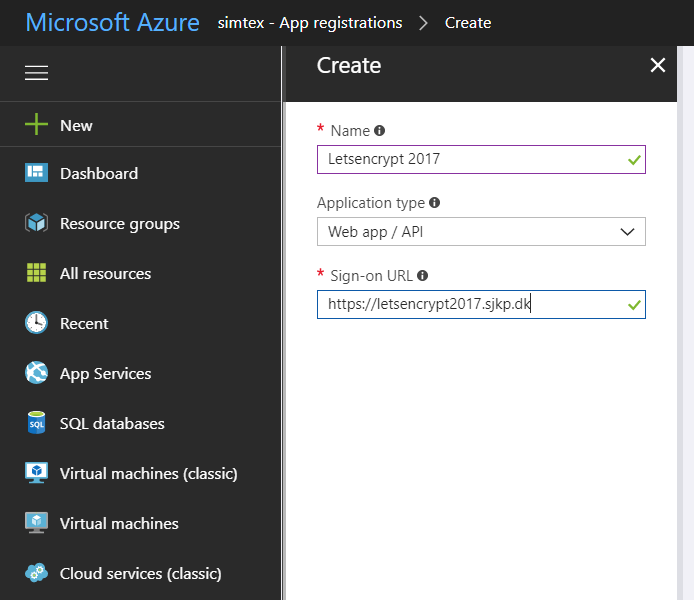
Fill in name of the application, this will also become the name of the service principal, and select WEB APP/API and click the next button. For SIGN-ON URL, provide the URI to a web-site that describes your application. The existence of the web-site is not validated. You can use the url to the web app you want SSL on. Click Create
You have created your application which also creates a service principal for you.
The service principal is uniquely identified by its client id/application id to get that, select the newly created application
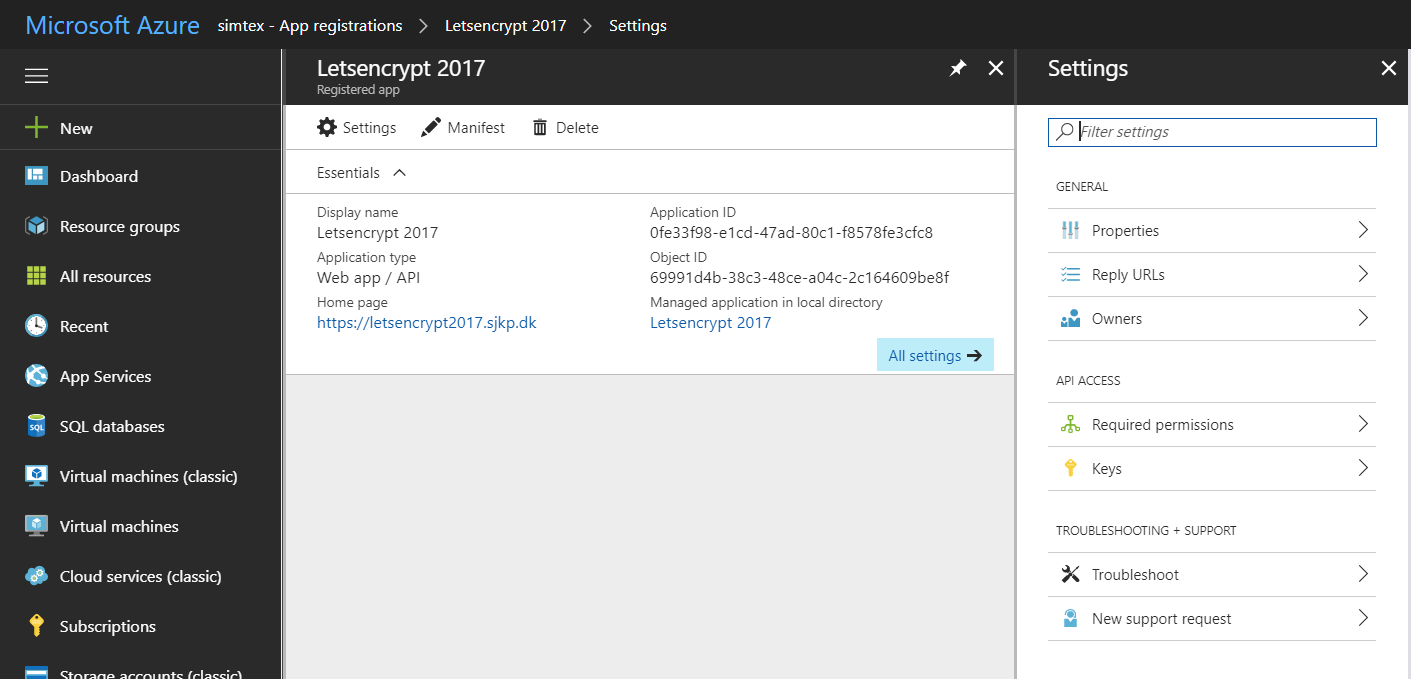
To setup the credentials for the service principal we must create a key for the application.
-
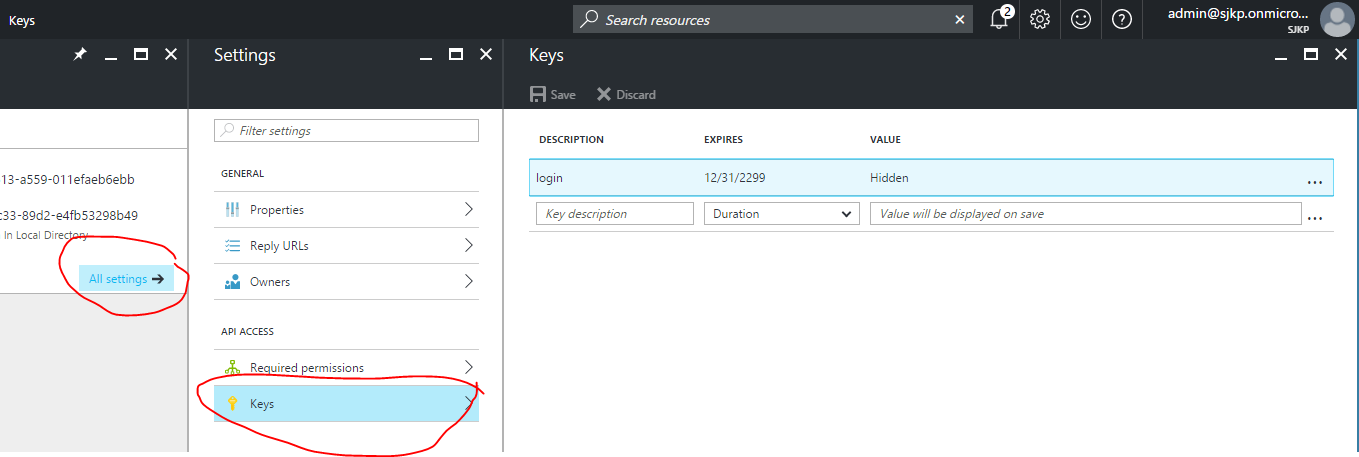
Click on the All settings and click Keys to setup a new key for your application (the service principal password).
-
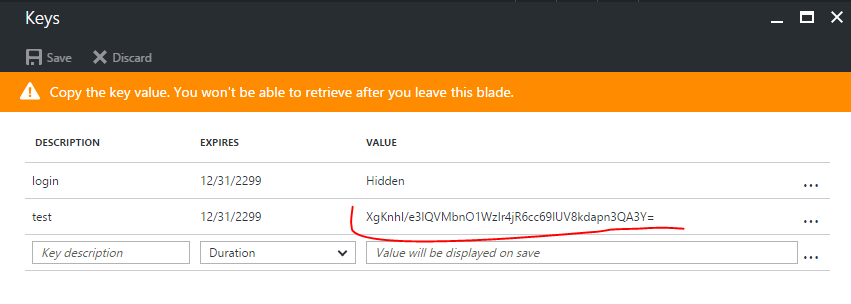
Give the new key a description, select a duration and hit Save, after saving the client secret will show up in the value column. Save that for later, You will not be able to retrieve the key later so you will want to copy it now.
Your application is now ready and the service principal created on your tenant. When signing in as a service principal be sure to use:
- Application ID/CLIENT ID - as your user name (note: This is the Id of the Azure Application you created, not the descriptive name of the key, that name is only for information).
- KEY - as your client secret/password.
Once the service principal has been created it needs "Contribute" Access to the resource group(s) that contains the App Service Plan and the App Service. If they are in separate resource groups it is important to grant access to both.
NOTE You must grant access at the resource group or subscription level, if you just grant access to the app service the extension will not be able to install the certificate and it will fail
You can use the new azure portal to grant access to the service principal.
-
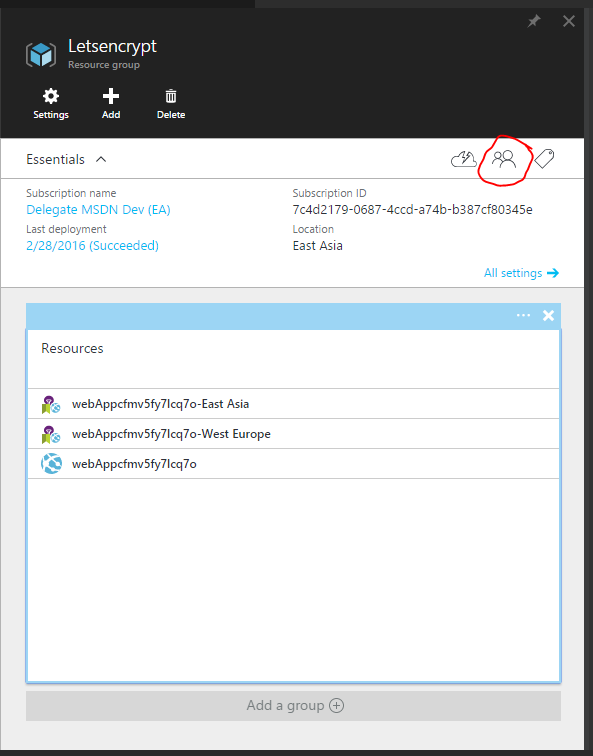
In the portal find the resource group for you App Service and App Service Plan, click the Access button
-
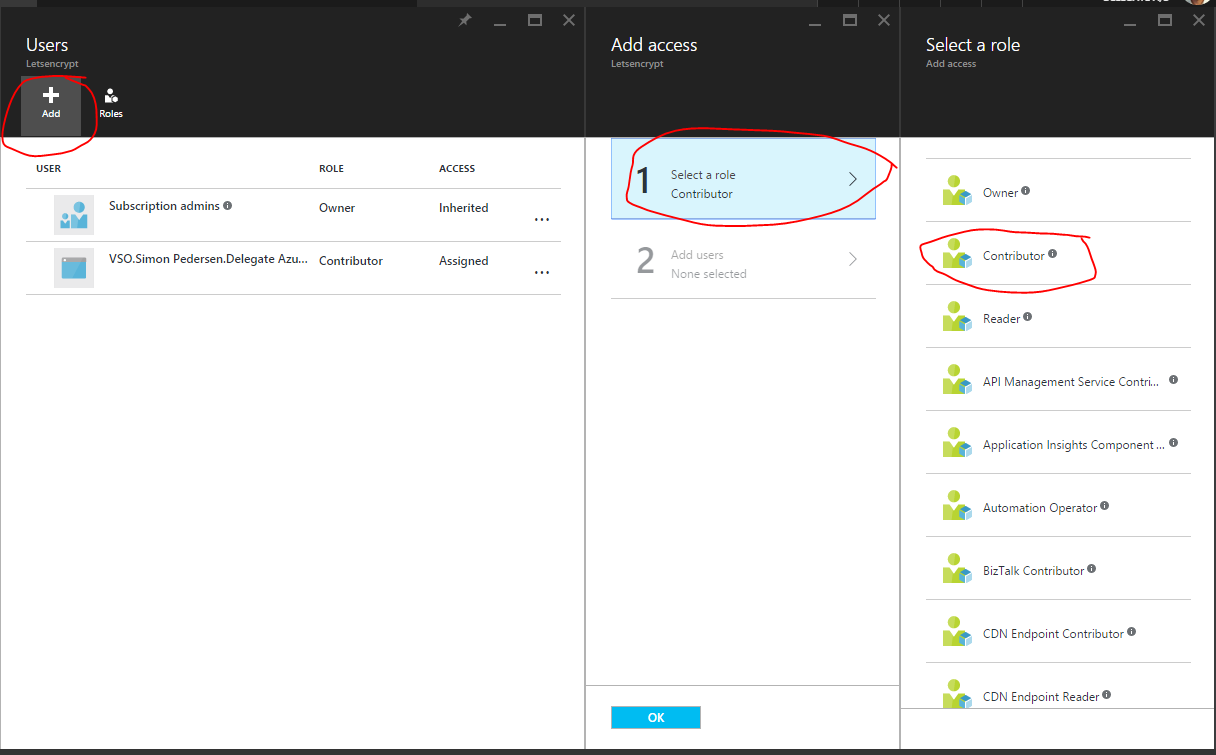
Click Add, and select the Role Contributor
-
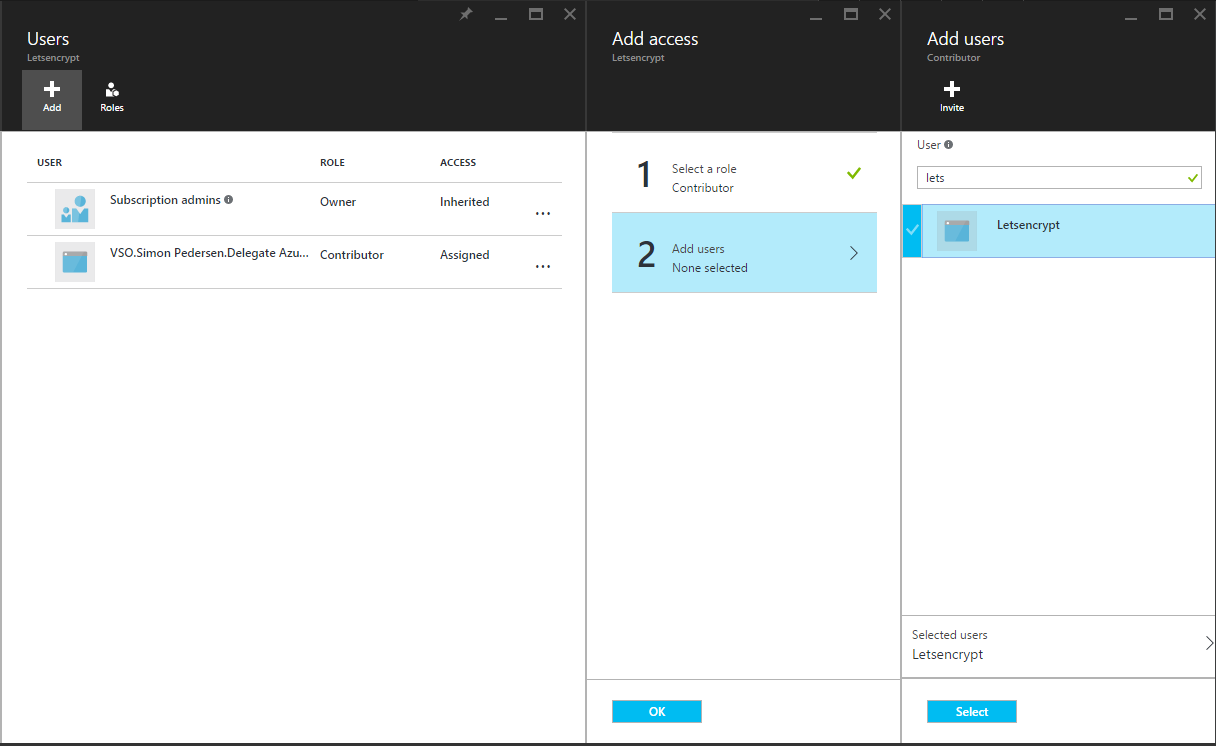
Now add the service principal user you created earlier to the role, you can find the service principal by searching for the Application Name you used in step 7 of creating the Service Principal.
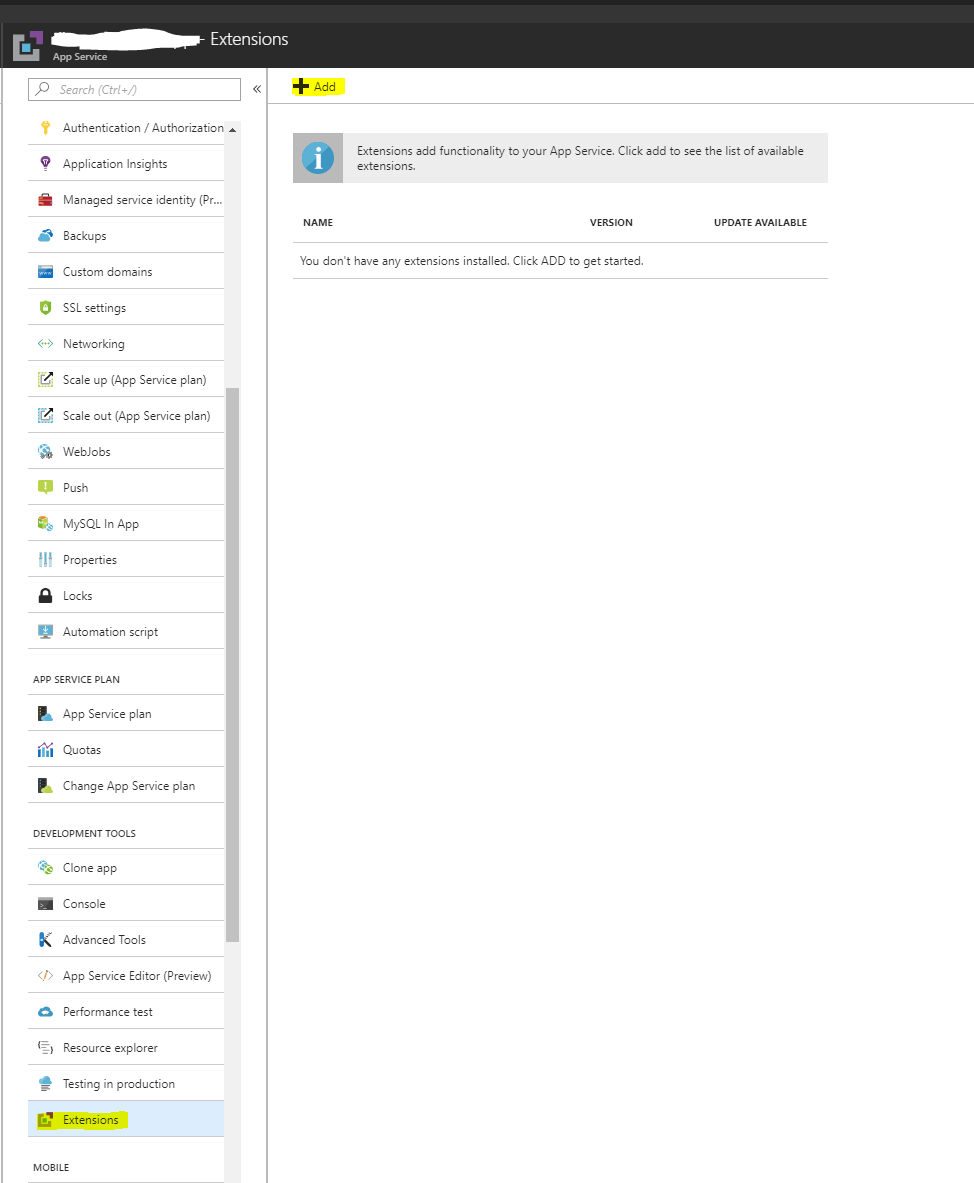
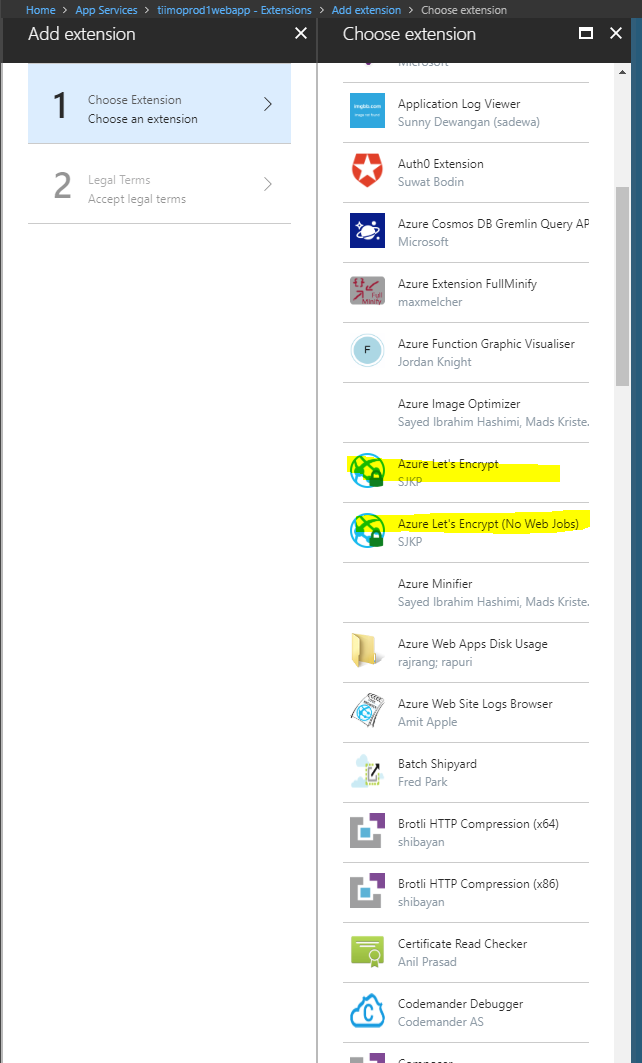
To install the site extension you have to use the portal.azure.com (as of May 2018, it is buggy if you try to install it from the KUDU site)
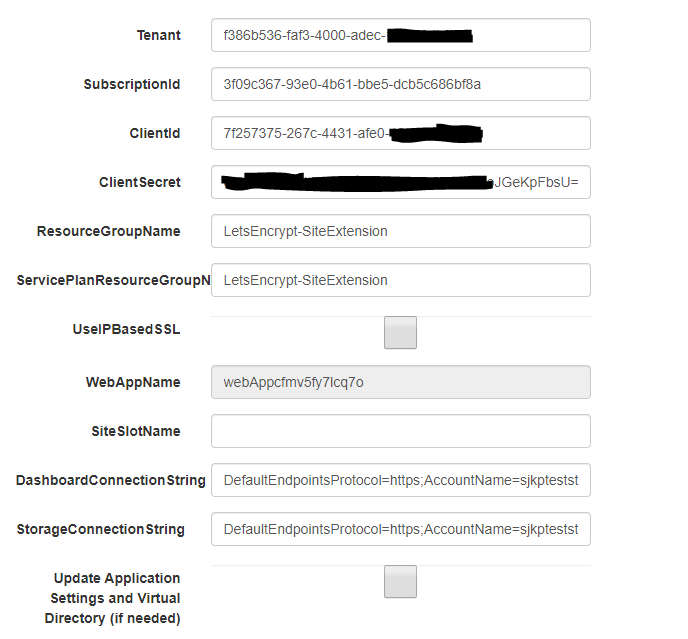
With the prerequisites done we can finally get to configure the Site Extension and get SSL certificates for our site.
The first page of the site contains the following fields that must be provided by you. You can either fill them out from the site extension or you can set the properties as app settings.
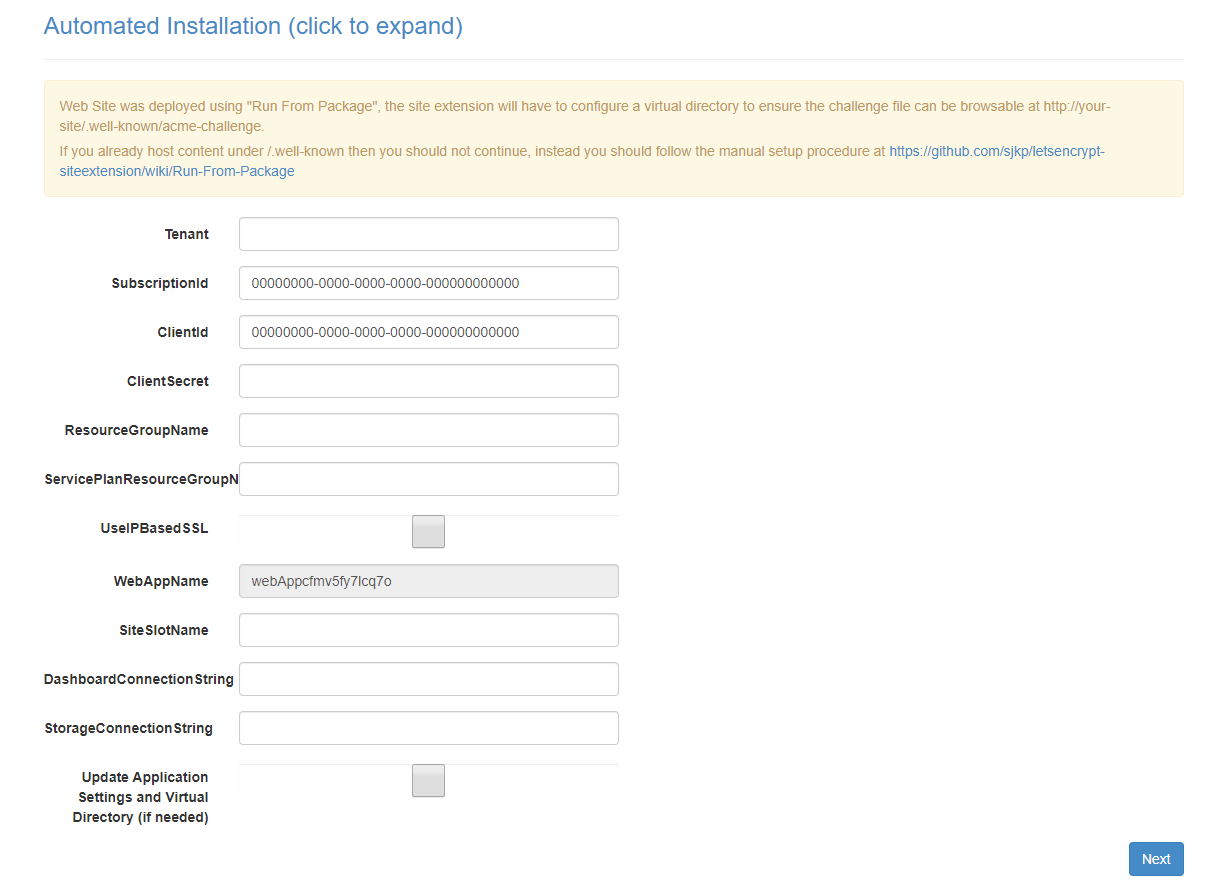
- Tenant - is the tenant name of the Azure AD that the service principal was created in, e.g. yourdomain.onmicrosoft.com or the tenantId
- SubscriptionId - is the subscription id that the resource groups belongs to. You get the ID from https://portal.azure.com/#blade/Microsoft_Azure_Billing/SubscriptionsBlade
- ClientId - is the client id of the application/service principal you created
- ClientSecret - is the password/key you created for the service principal
- ResourceGroupName - is the name of the resource group that the App Service is located in
- ServicePlanResourceGroupName - is the name of the resource group that the App Service Plan is located in, e.i. if you are hosting everything in the same resource group ServicePlanResourceGroupName should equal ResourceGroupName
- DashboardConnectionString - An Azure Storage Account connection string, required to be able to properly monitor the web job that runs in the background and updates the SSL certificate every third month.
- StorageConnectionString - An Azure Storage Account connection string, required for the web job that auto-renews the SSL certificate to work, can be the same as the DashboardConnectionString - but should not be reused for different web apps. If you are unsure about the format of the connecting string see section Azure Web Jobs
- Update Application Settings - set this to true to save the setting as web application settings, this is required if you didn't already add the settings as web app settings, so the values are available for the renew certificate web job later.
Once these settings have been filled out click next.
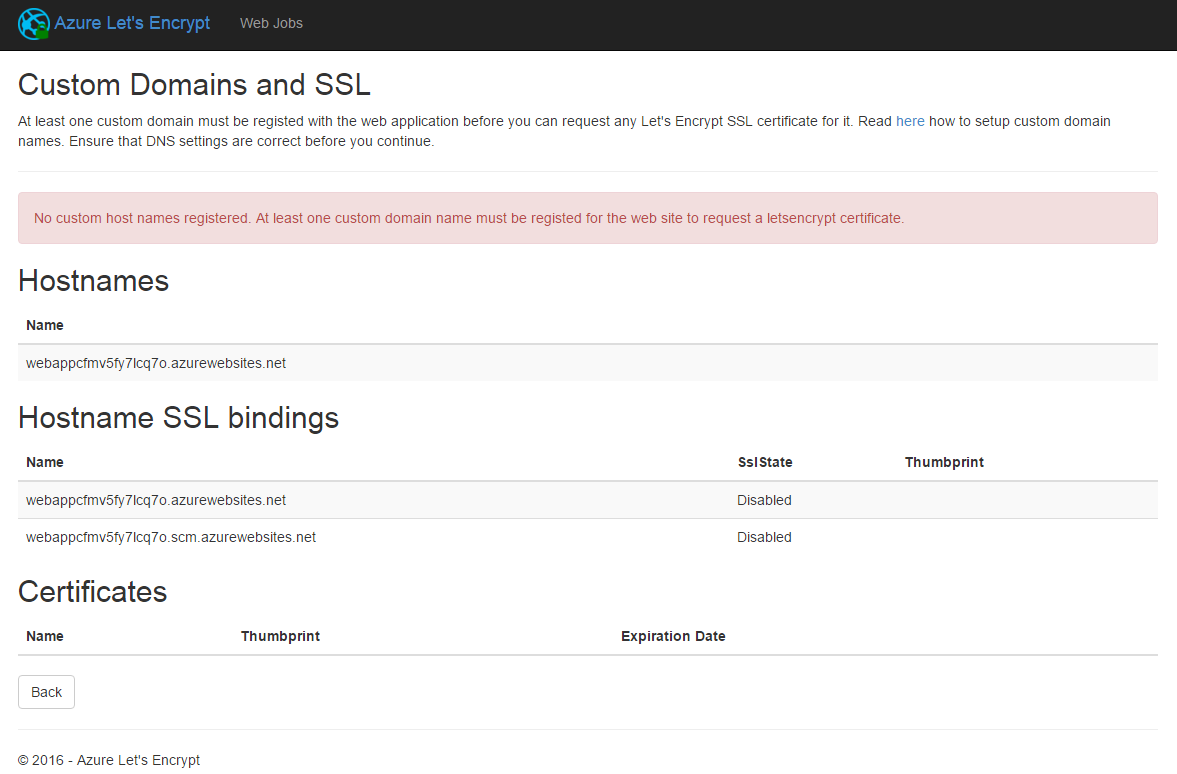
Before you can request a Let's Encrypt certificate for the web app, you need to register a custom domain name. This screen shows you already registered names, if you don't have any custom domain names registered you will see the following error.
To register a custom domain name with an Azure Web App use this guide: https://azure.microsoft.com/en-us/documentation/articles/web-sites-custom-domain-name/
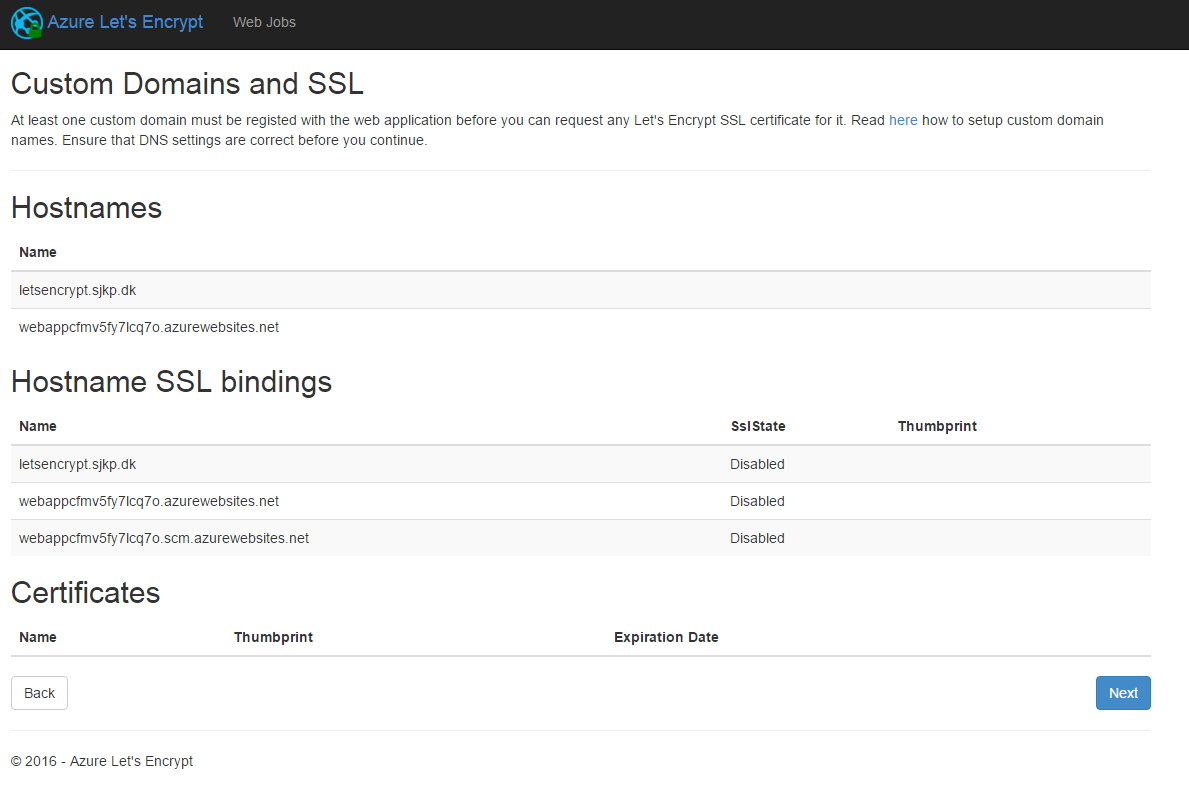
Once a domain name is registered you should see something similar to this
Now click next.
On the final screen you select which hostname(s) you want to request certificates for. You also have to provide an email address so, Let's Encrypt can get in touch with you. If you are doing testing you can request the certificate from the staging environment (this will be self-signed certs). In the production environment you can only do 5 certificate requests per week, per domain.

WARNING Before you proceed ensure that you site can serve static files from a http:///.well-known/acme-challenge/ folder that is create by the extension, if you application cannot serve static files from that folder the site extension will not be able to do its job (the extension will create the folder). Please note Lets Encrypt servers will access the path over http. If you application is .NET ASP application, the extension will place a web.config in the folder, so then you don't have to do anything, but if you application is a node.js, java or .NET core application you have to ensure that static files can be served from the folder.
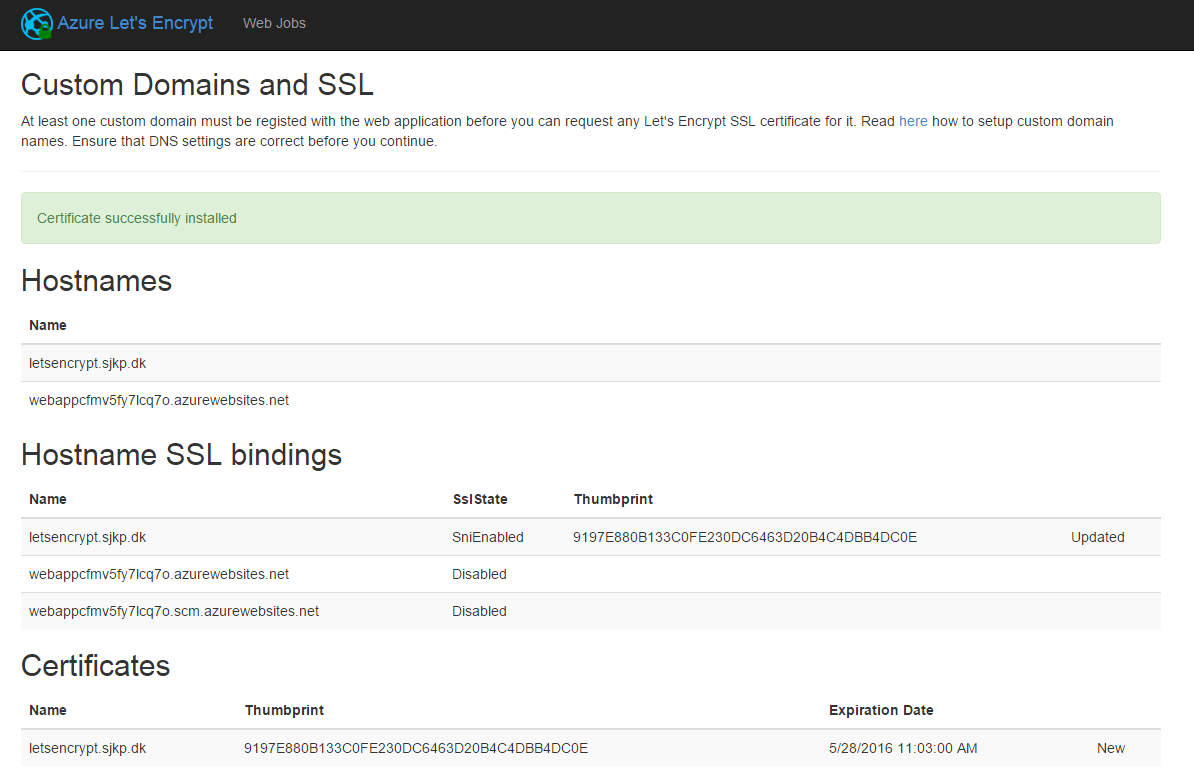
Click Request and install certificate and wait a little, while the certificate gets requested and installed and assigned to your domain. Once the process is done you get redirect to a the previous view, that should look like this
If you encounter any problems during the last step, please check the troubleshoot page and create an issue if you encounter any new problems.